getter와 setter toString, 생성자 등을 자동으로 생성해주는 Lombok라이브러리 설치 방법을 알아보겠다.
Lombok 설치하기
1) 관리자 권한으로 cmd창을 열고 다운받은 lombok.jar파일의 경로를 실행해준다.

정상적으로 실행이 되면 아래 화면이 나온다.
이클립스 경로를 찾지 못한다면 경고창이 뜨는데 Specify Location을 클릭하여 직접 위치를 지정해주면 된다.

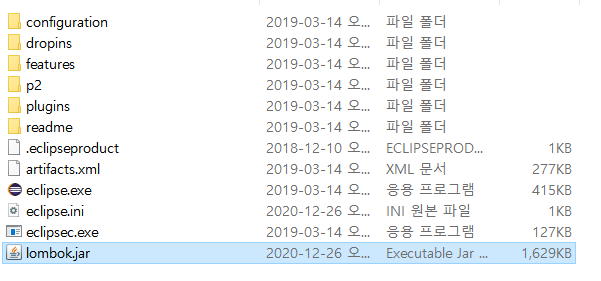
설치가 끝나면 아래 사진과 같이 이클립스 경로에 lombok.jar 파일이 추가된 것을 볼 수 있다.
Lombok 테스트하기
lombok을 사용하기 위해서 pom.xml에 라이브러리를 추가해줘야 한다.
아래 코드를 복사해도 되지만 mvnrepository.com/ 에서 검색을 통해 쉽게 다운 받을 수 있다.
<!-- https://mvnrepository.com/artifact/org.projectlombok/lombok -->
<dependency>
    <groupId>org.projectlombok</groupId>
    <artifactId>lombok</artifactId>
    <version>1.18.0</version>
    <scope>provided</scope>
</dependency>
테스트를 위해서 spring-test 라이브러리를 추가해준다.
		<!-- https://mvnrepository.com/artifact/org.springframework/spring-test -->
		<dependency>
		    <groupId>org.springframework</groupId>
		    <artifactId>spring-test</artifactId>
		    <version>${org.springframework-version}</version>
		    <scope>test</scope>
		</dependency>
테스트를 위해서 junit라이브러리의 버전을 4.12로 변경한다.
		<dependency>
			<groupId>junit</groupId>
			<artifactId>junit</artifactId>
			<version>4.12</version>
			<scope>test</scope>
		</dependency>
Lambok을 사용할 때 문제가 생길 수 있으므로 log4j라이브러리의 버전을 변경해준다.
		<dependency>
			<groupId>log4j</groupId>
			<artifactId>log4j</artifactId>
			<version>1.2.17</version>
		</dependency>
이제 클래스를 생성해서 테스트해보자.
간단히 Chef와 Restaurant 클래스를 생성했다. Restaurant클래스는 chef를 필드로 한다.
@Component는 스프링에서 관리 받아야하는 객체(빈)라는 것을 root-context.xml에 알려주는 어노테이션이다.
@Data는 Lambok에서 지원해주는 어노테이션으로 자동으로 setter와 getter 등을 생성해준다.
getter만 필요한 경우 @Getter를 설정해주면 된다.
@Component
@Data
public class Chef {

}
@Setter(onMethod_ = @Autowired)는 setter메소드를 이용해서 자동으로 chef객체를 주입했다.
@Component
@Data
public class Restaurant {
	@Setter(onMethod_ = @Autowired)
	private Chef chef;
}
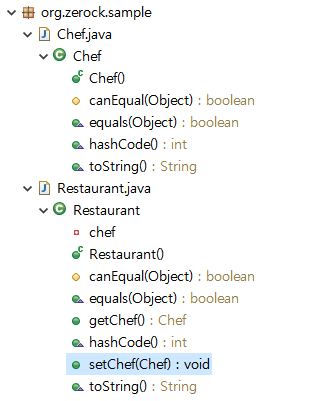
간단하게 @Data 어노테이션을 붙였을 뿐인데 아래와 같이 다양한 메소드가 자동으로 생성된 것을 볼 수 있다.
이제 스프링 빈을 스캔해야하는데 이 설정은 root-context.xml에서 해준다.
root-context.xml파일을 열어서 Namespaces항목에 들어간다.
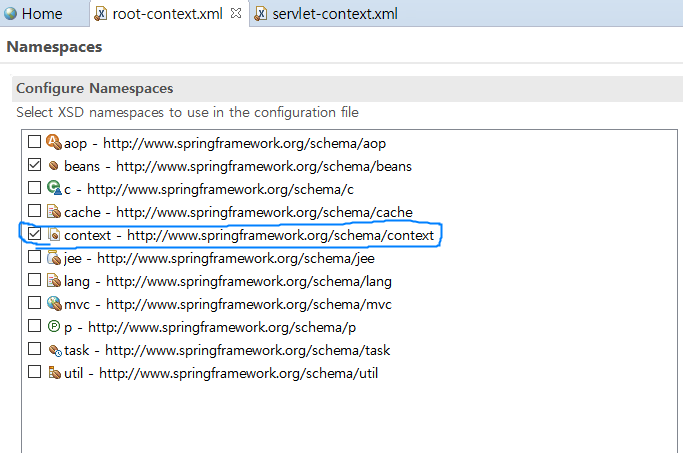
이제 <context> 태그를 사용할 수 있다.
<context:component-scan>태그를 사용해서 빈으로 등록할 패키지명을 설정해주면 된다.
그러면 해당 패키지 내의 모든 클래스 중 @Component 어노테이션이 있는 클래스를 빈으로 등록한다.
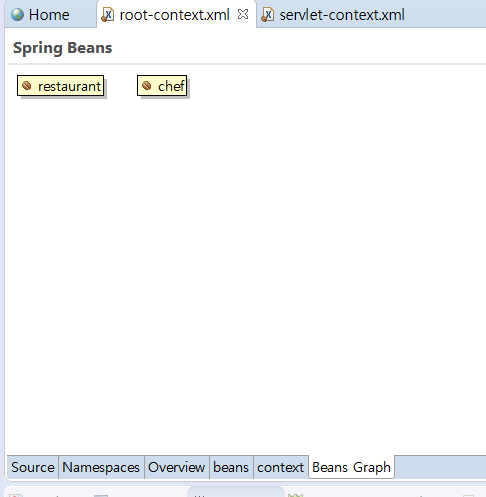
Beans Graph항목을 누르면 빈으로 등록된 클래스들을 볼 수 있다.
src/test/java 위치에 아래 클래스를 생성해서 test해본다.
@RunWith(SpringJUnit4ClassRunner.class)
@ContextConfiguration("file:src/main/webapp/WEB-INF/spring/root-context.xml")
@Log4j
public class SampleTests {
	@Setter(onMethod_ = {@Autowired})
	private Restaurant restaurant;

	@Test
	public void testExit() {
		assertNotNull(restaurant);
		log.info(restaurant);
		log.info("---------------");
		log.info(restaurant.getChef());
	}
}
결과 이미지이다.
직접 Restaurant객체를 생성한적이 없는데 아래와 같이 정상적으로 출력이 되었다.

'Spring > 코드로 배우는 스프링 웹 프로젝트' 카테고리의 다른 글
| 마이 바티스 사용하기 (0) | 2021.02.22 |
|---|---|
| 커넥션 풀 설정하기 (0) | 2021.02.22 |
| Oracle Sql Developer 설정하기 (0) | 2021.02.22 |
| 생성자를 통한 주입 (0) | 2021.02.22 |
| 프로젝트 생성 및 설정하기 (0) | 2021.02.22 |